![[cafeteria]](cafeteria-wordmark.svg)
Connector Setup Guide
Set up the [cafeteria] MCP server in Claude
Connect [cafeteria] to Claude and query our Gen Z consumer-insights data inside your chats — top brands, mention counts, demographics, and verbatims, on demand.
YOU'LL NEED
- 1The Claude desktop app, signed in to your account
- 2The email you use to sign in to [cafeteria] (for the sign-in code)
- 3About 3 minutes
Server URL · paste in Step 3
https://mcp.cafeteria.page/mcp
Open Settings
In the Claude desktop app, click your name in the bottom-left corner to open the account menu, then choose Settings.
Add a connector
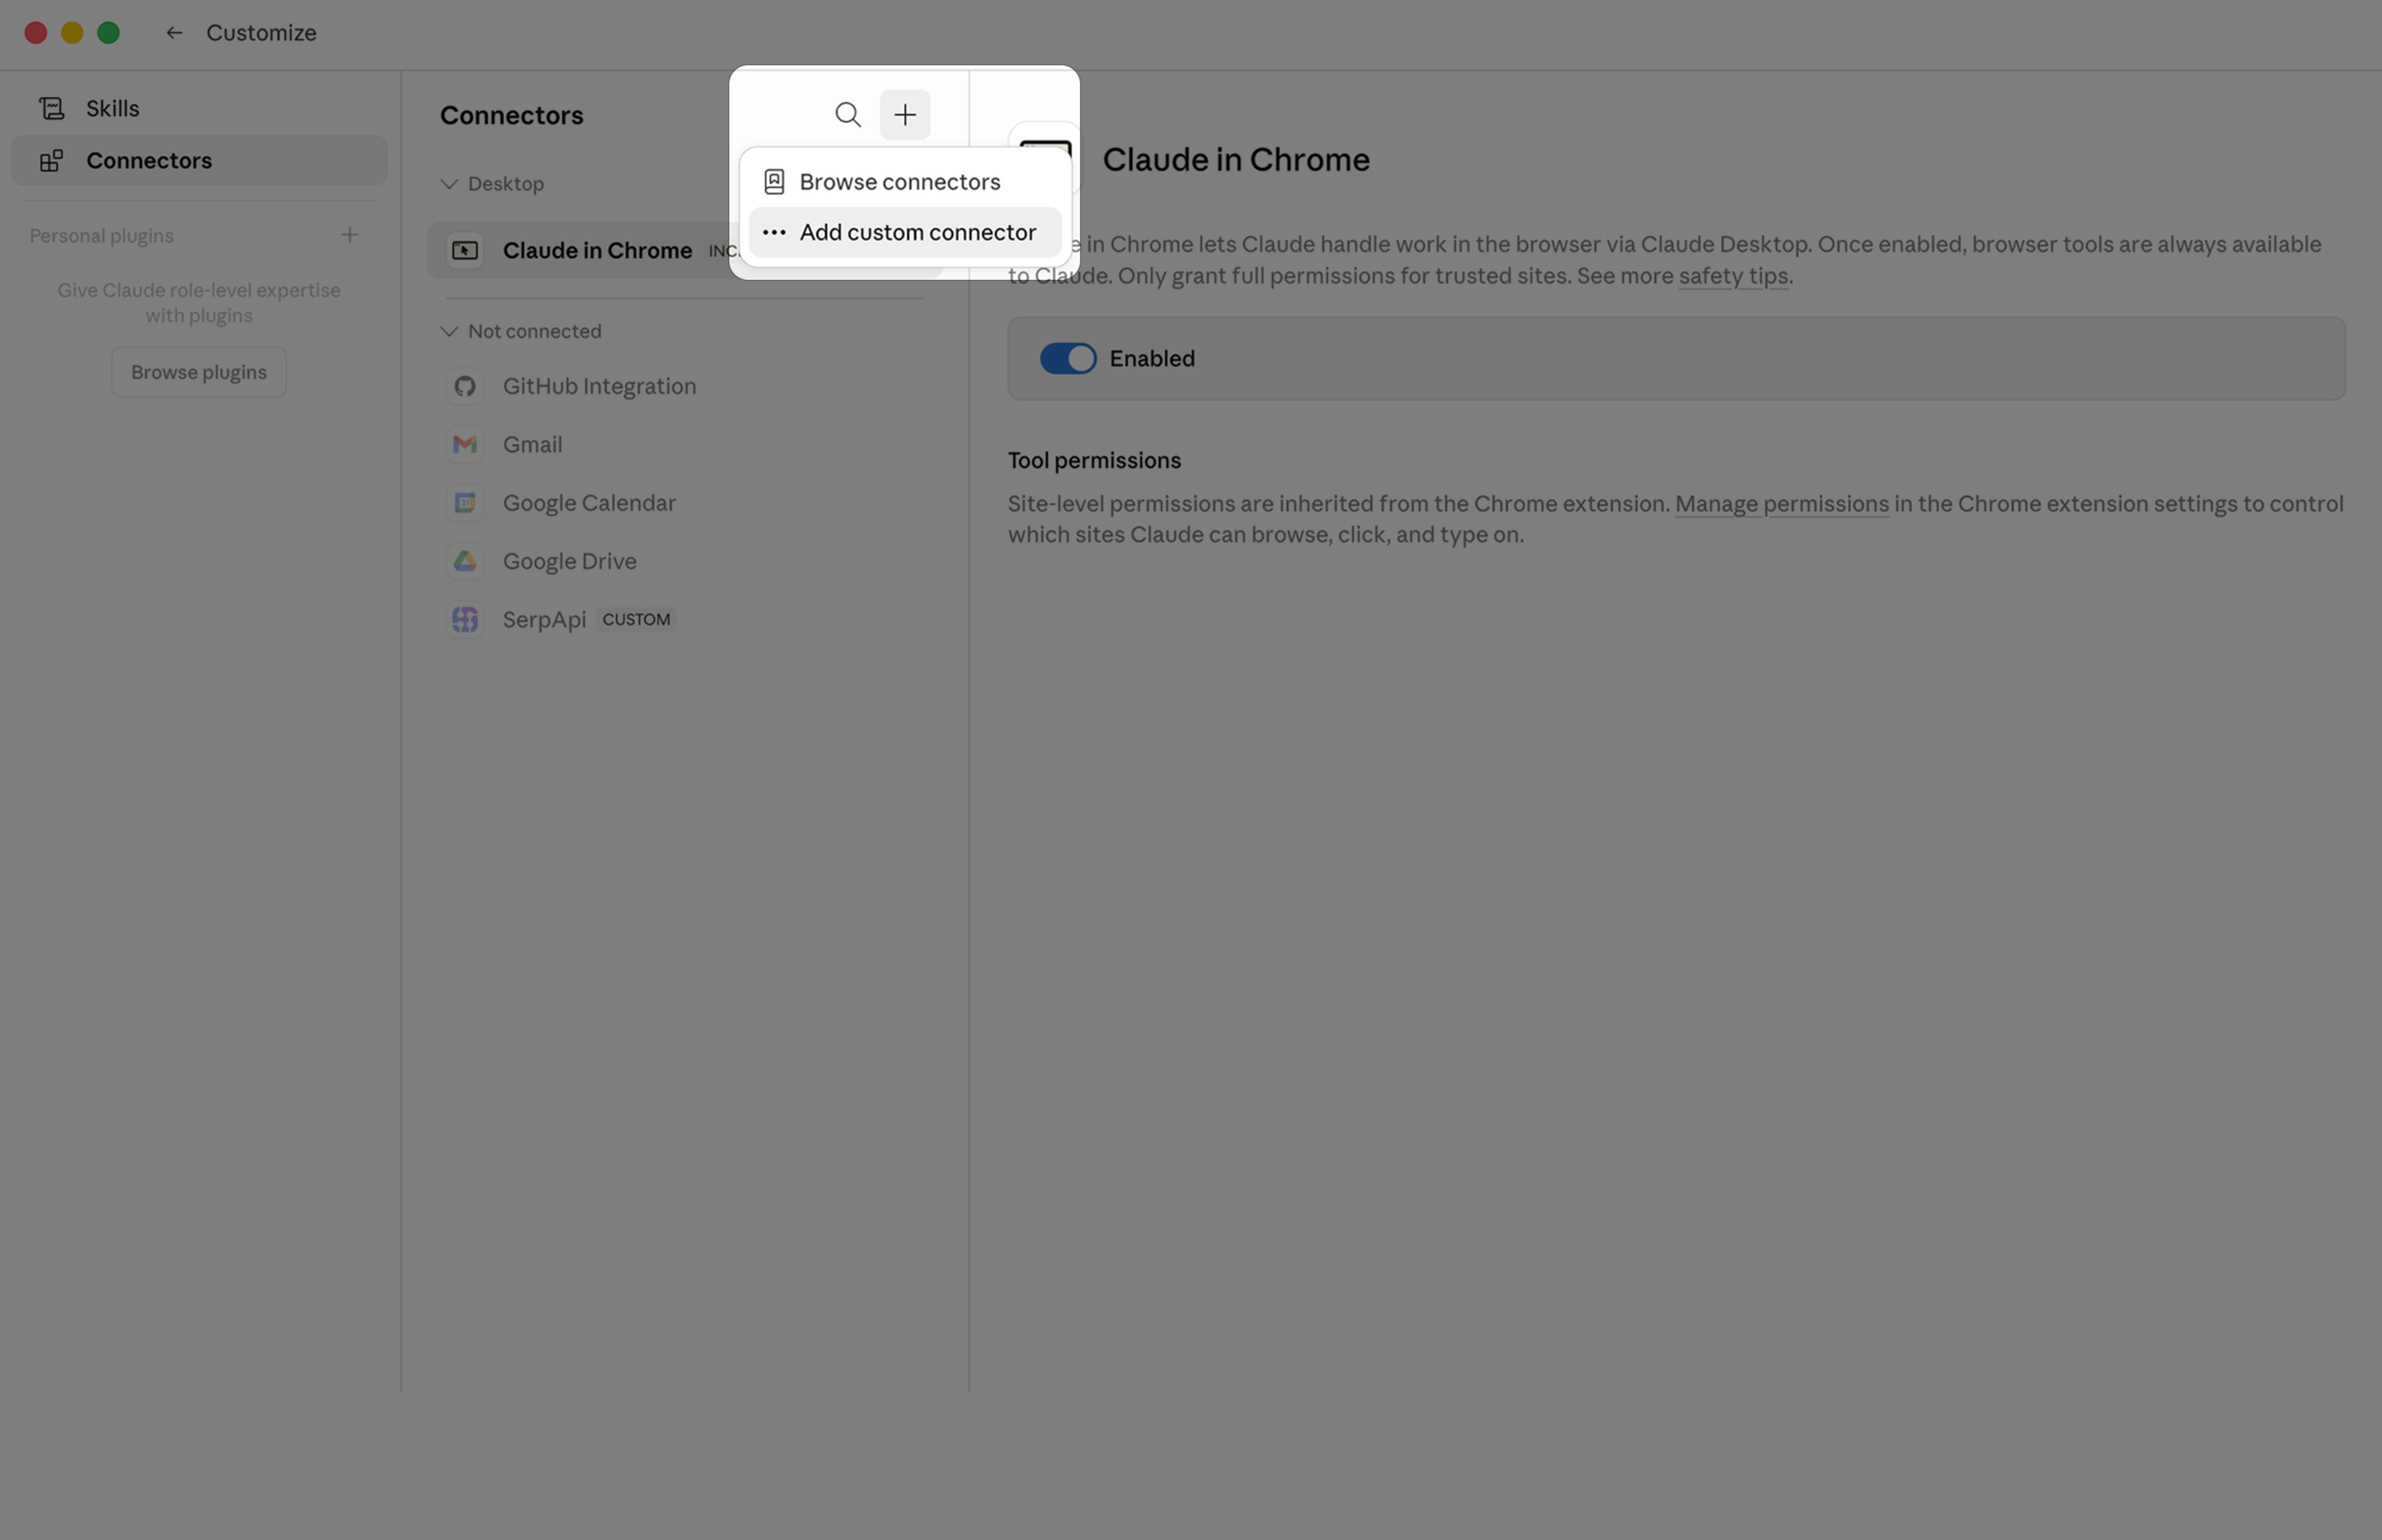
Go to Customize → Connectors in the left sidebar, then click + or select Add custom connector and continue below.
Note: On a Team or Enterprise plan, a Workspace Owner adds the connector once (under Organization settings → Connectors) and the whole team gets access automatically — members just click Connect on the [cafeteria] connector row.
Enter the server details
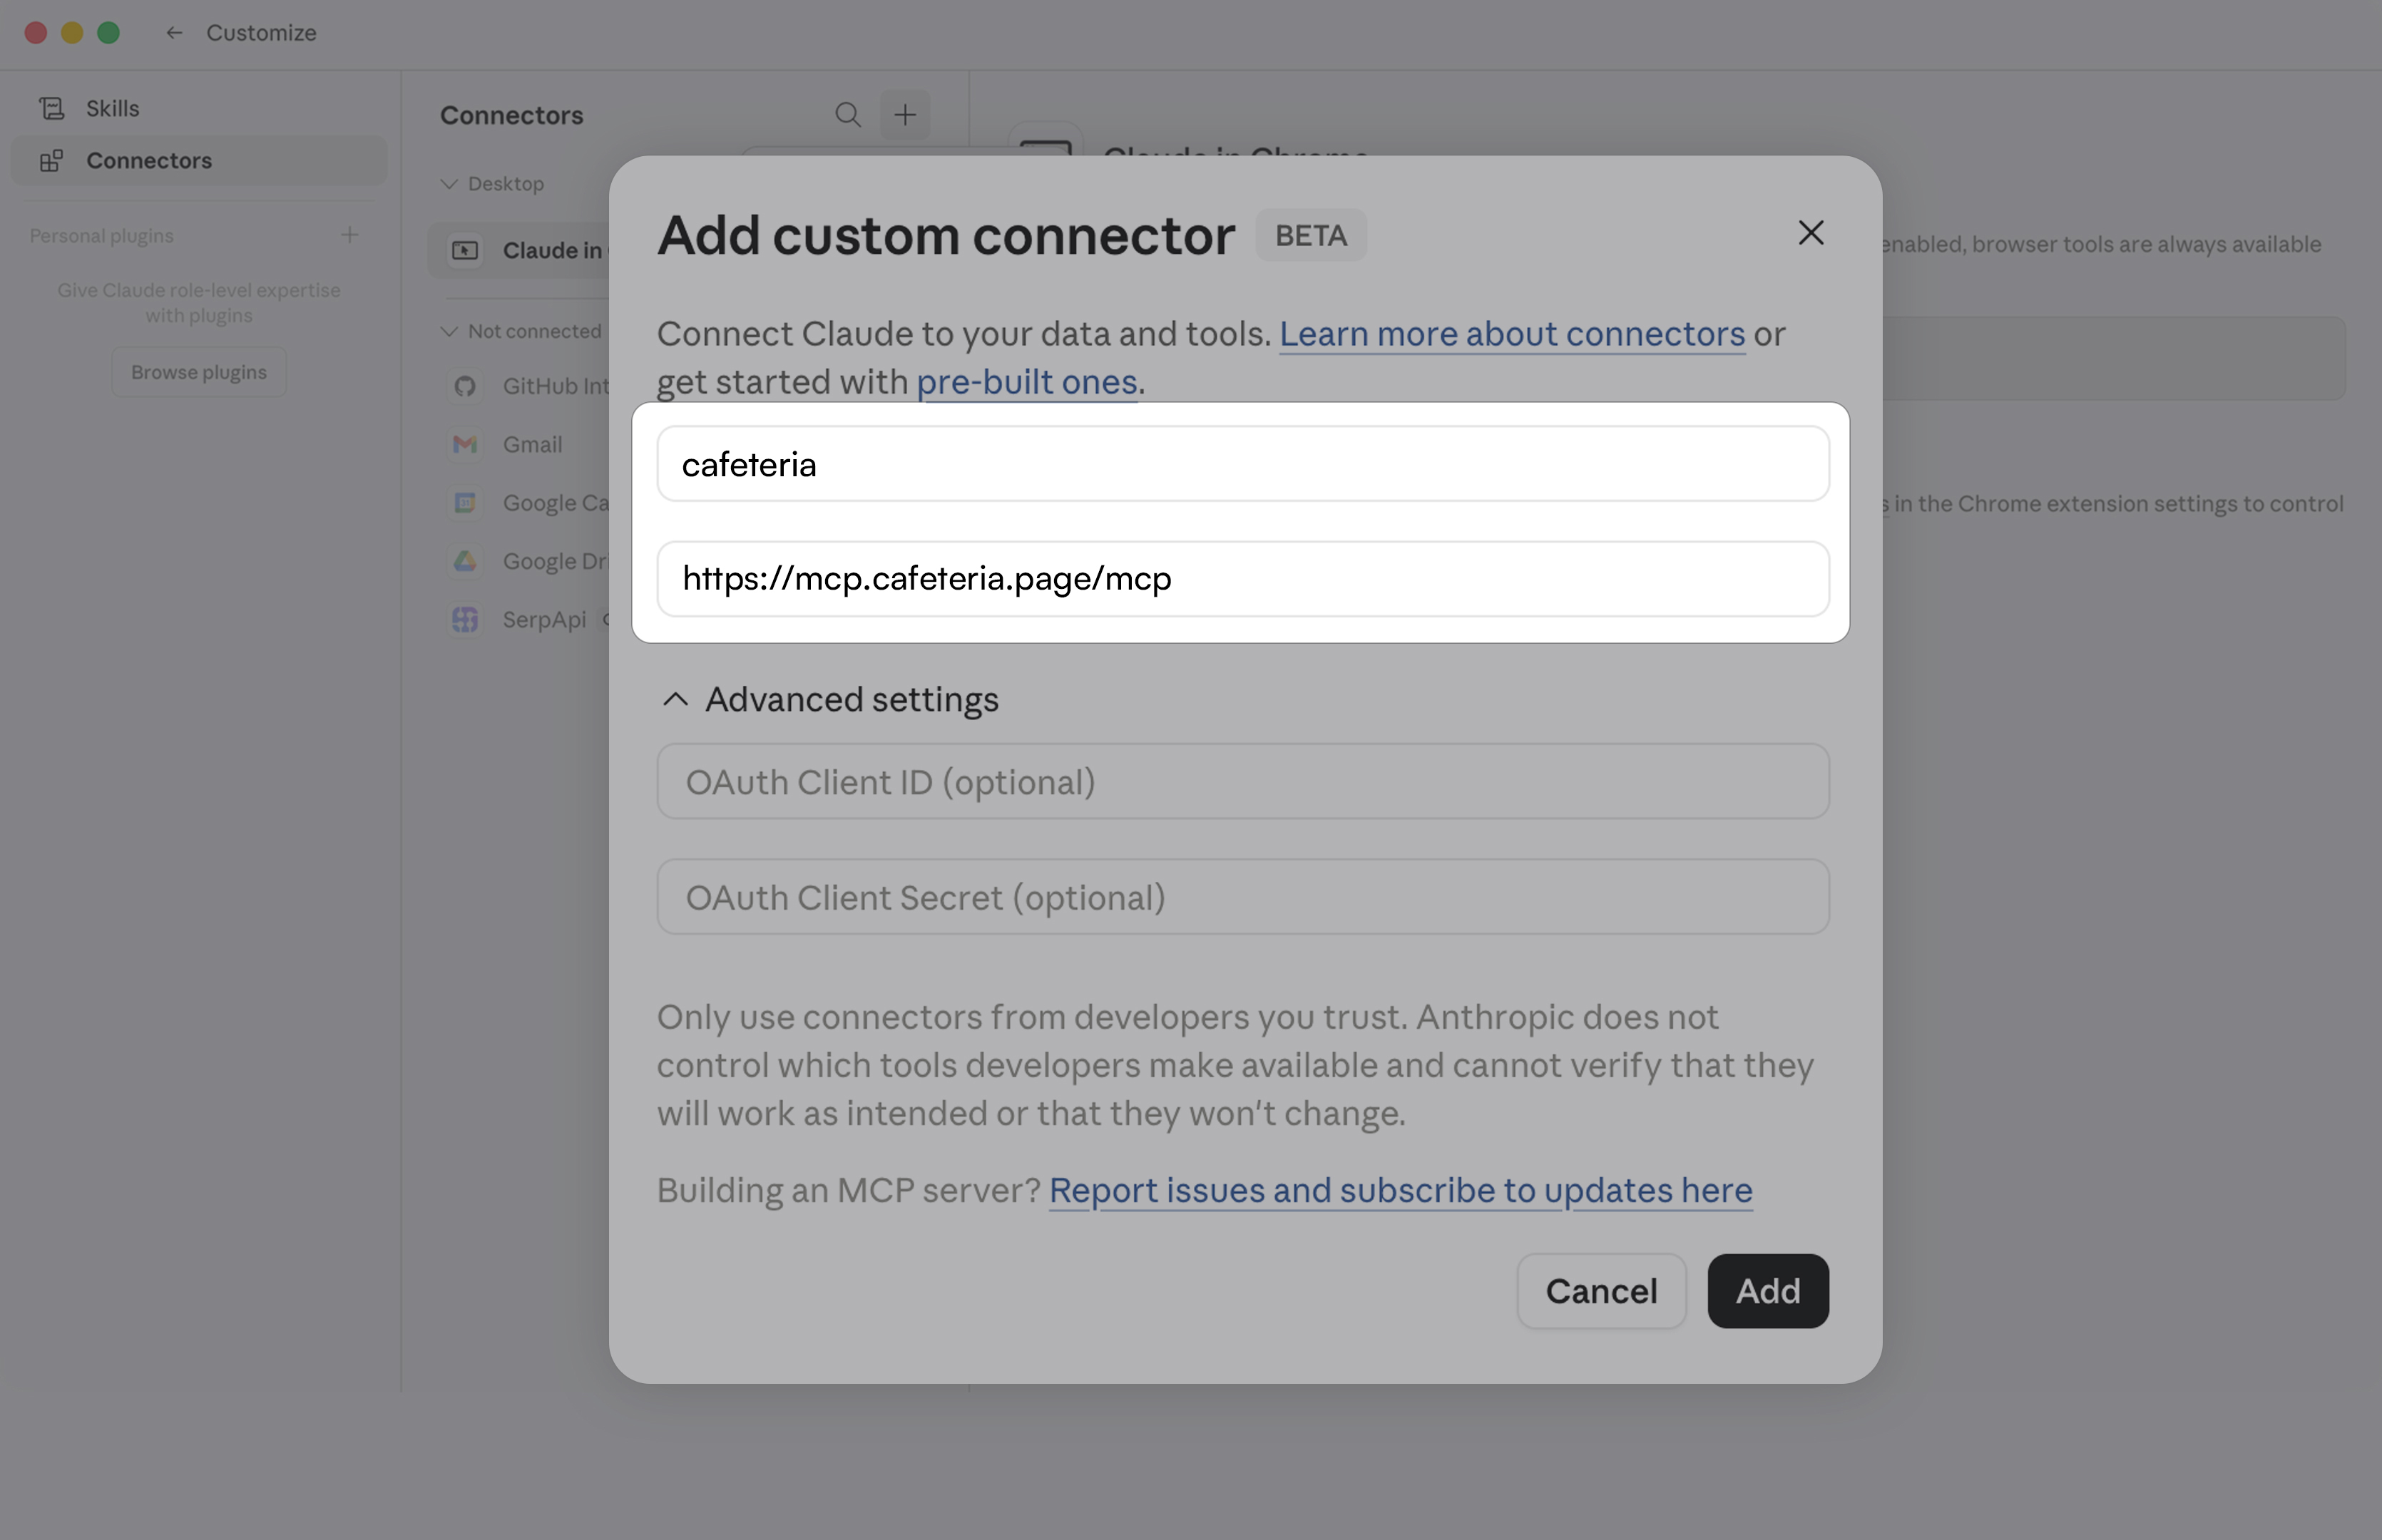
Type a Name for the connector (for example, cafeteria) and paste the server URL into the Remote MCP server URL field: https://mcp.cafeteria.page/mcp.
Leave Advanced settings empty and click Add.
Sign in with your email
A browser window opens. Enter the company email address you use to sign in to [cafeteria] and click Email sign-in code (or use Continue with SSO if your team uses single sign-on). Then check your inbox for the 6-digit sign-in code and type it into the boxes to verify.
Authorize access
Review what Claude will access, pick your workspace from the Organization access dropdown, then click Allow access.
You’re connected
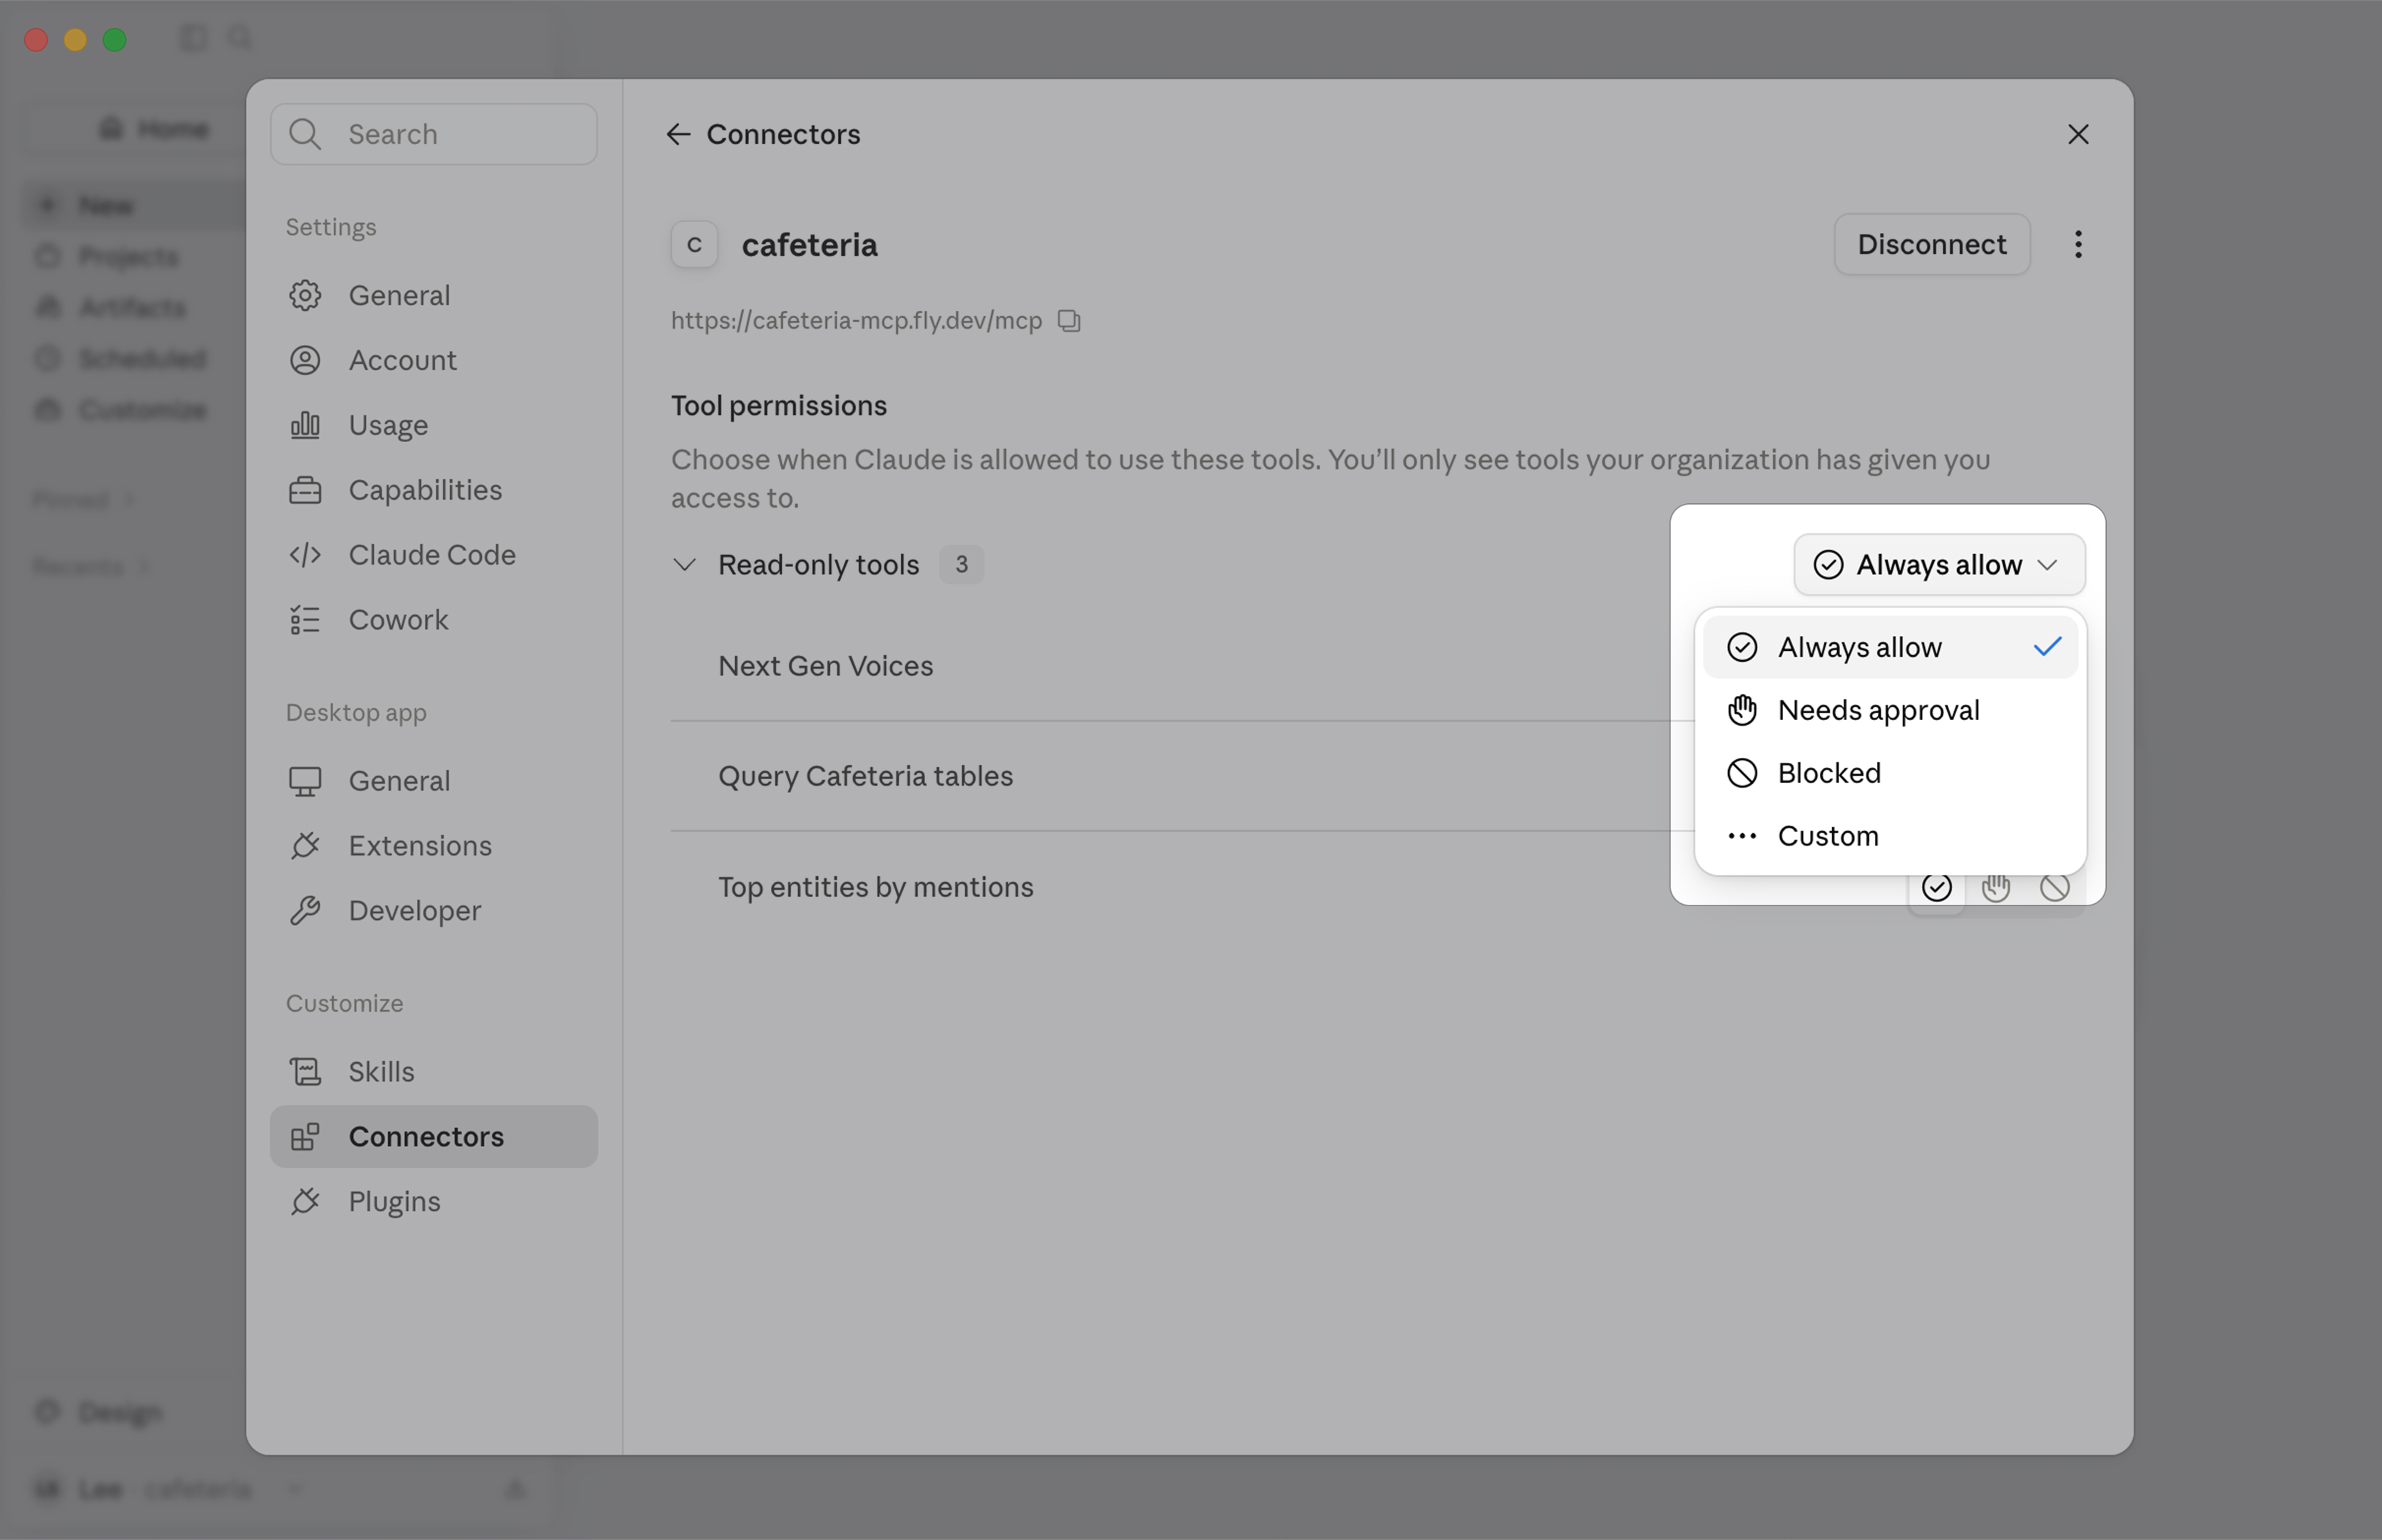
You’ll return to Claude with the cafeteria connector listed under Web. Its tools — Next Gen Voices, Query Cafeteria tables, and Top entities by mentions — are ready to use. Adjust each tool’s permission to Always allow (the default is Needs approval), then start asking Claude about [cafeteria] data.
Need to make a change later?
To review tool permissions, reconnect, or remove the connector, go to Customize → Connectors and select cafeteria.